
Appearance
Creator Guide
As a creator, you build and publish quizzes on the platform. You can generate questions using AI, set prices, view analytics, and receive payouts.
Access your dashboard at https://yourdomain.com/creator.
Creator Dashboard
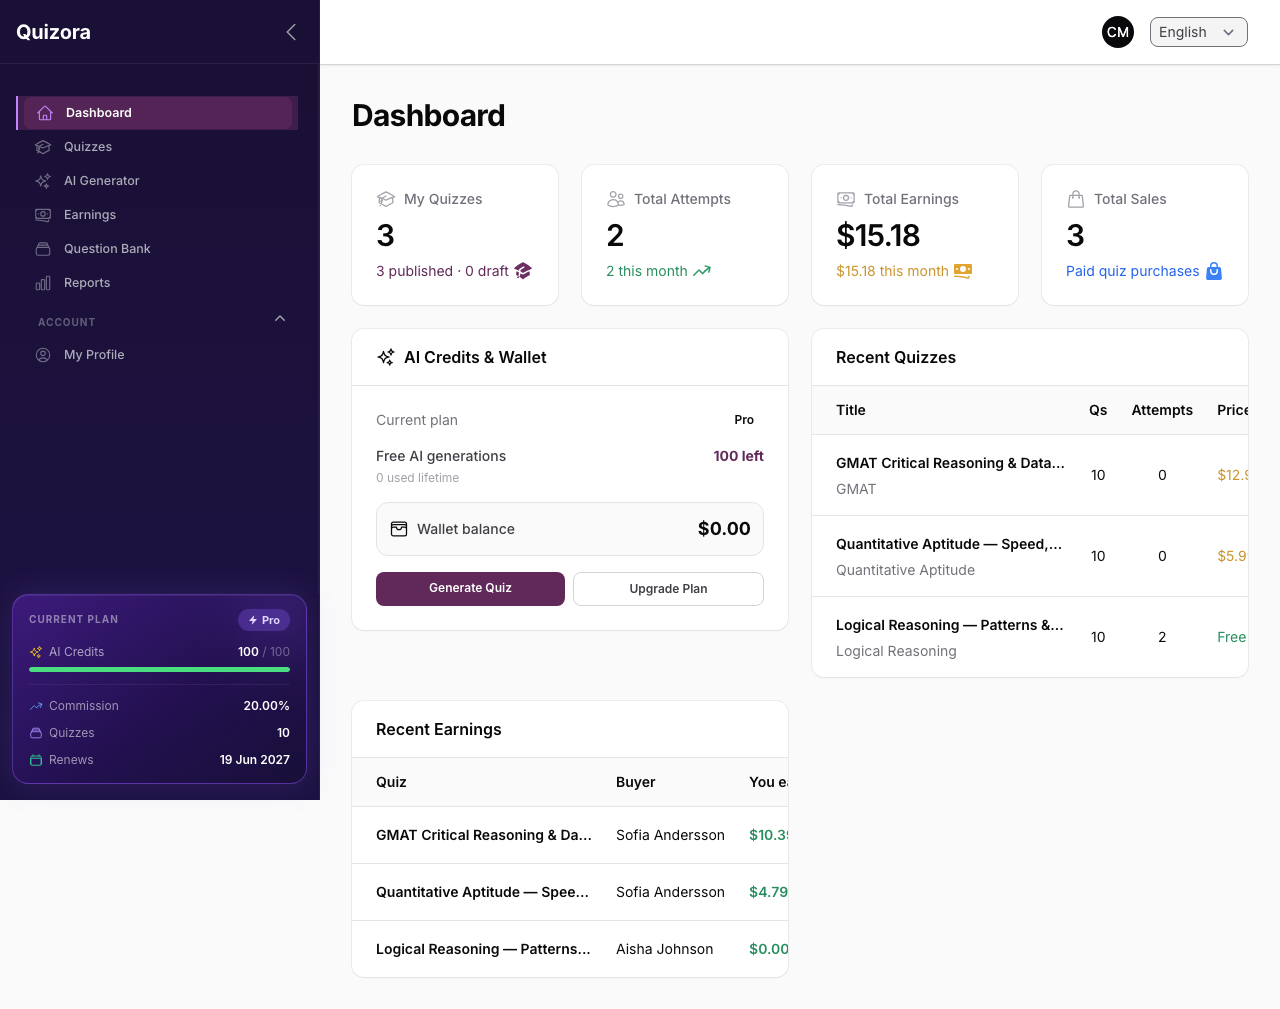
Your dashboard shows:
- Total quizzes (drafts, published, archived)
- Total quiz sales and revenue
- AI credits remaining (free) and wallet balance
- Recent quiz attempts by your students
Creator Login
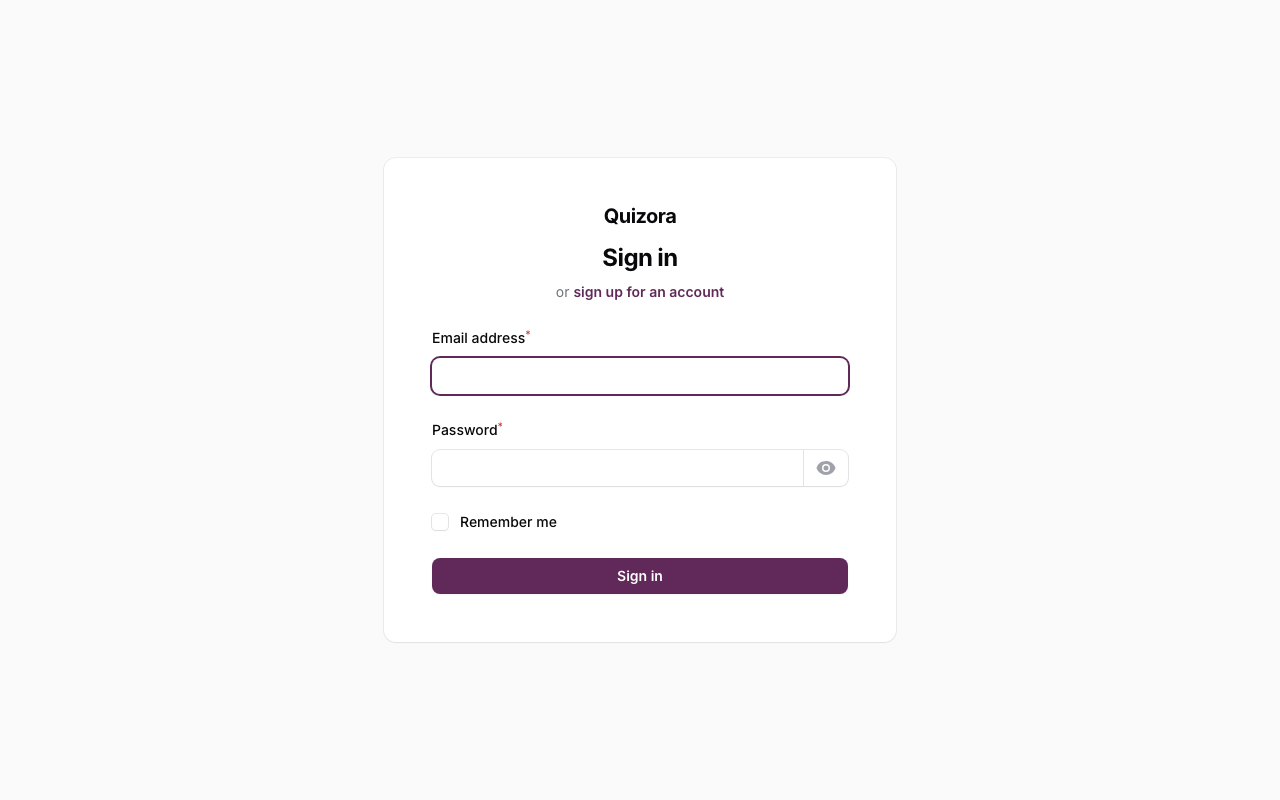
Access your creator panel at https://yourdomain.com/creator. Use your creator account email and password to sign in.
Creating a Quiz
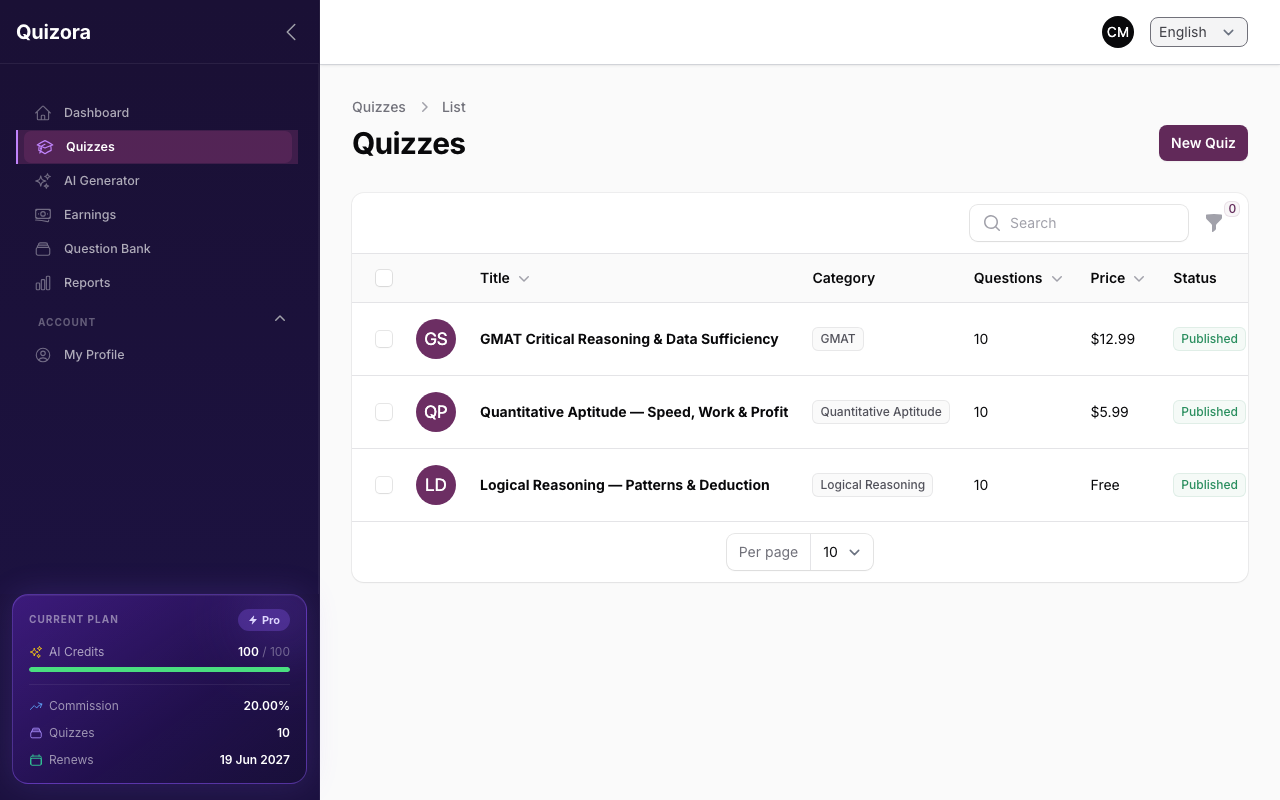
Go to Creator → Quizzes → New Quiz.
The quiz creation wizard has four steps:
Step 1: Basic Information
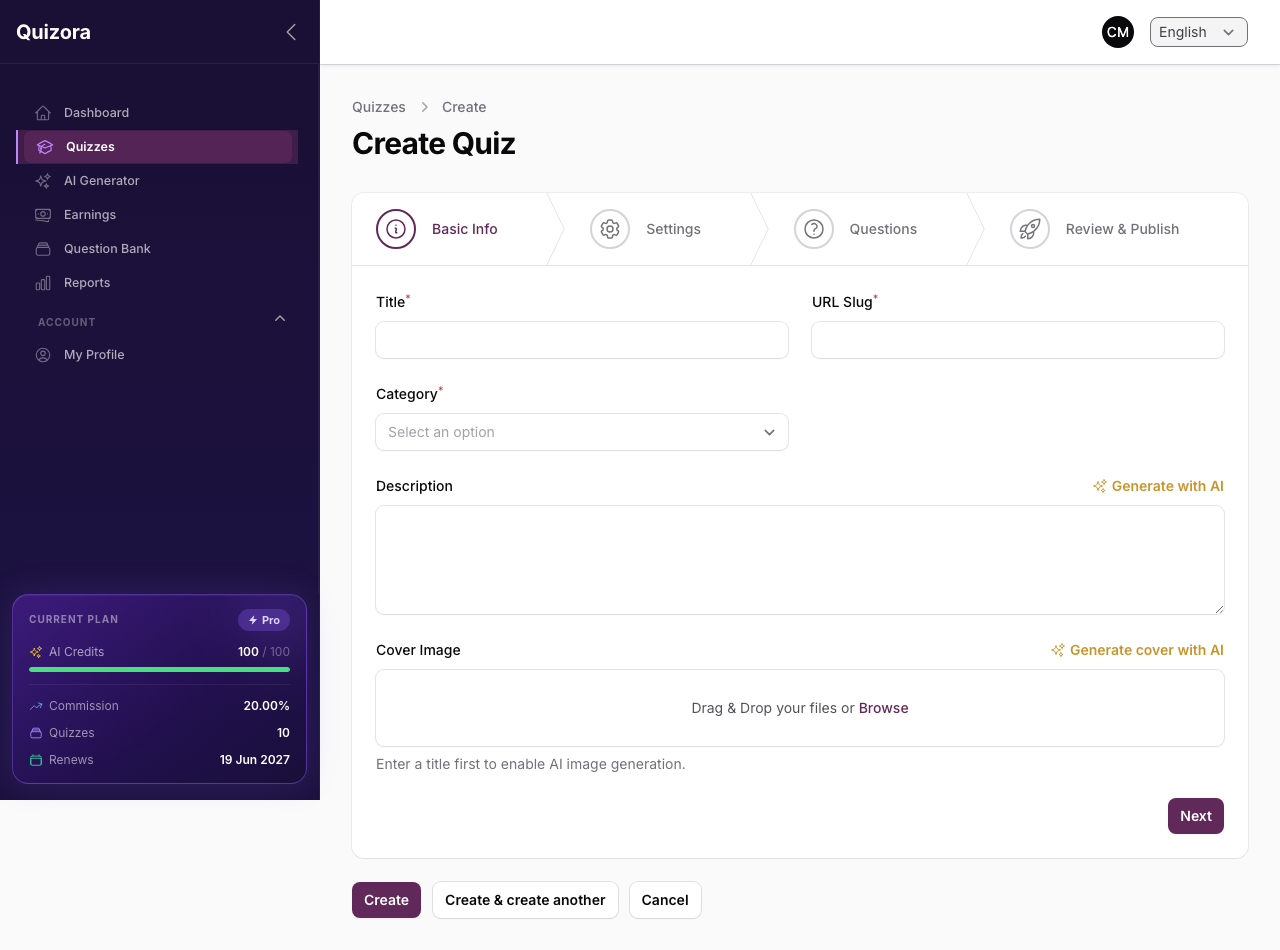
- Title — What your quiz is called (shown on the discovery page)
- Category — Pick the most relevant category
- Cover Image — A banner image for your quiz (recommended: 1200×630 px)
- Description — Tell potential students what the quiz covers
Step 2: Quiz Settings
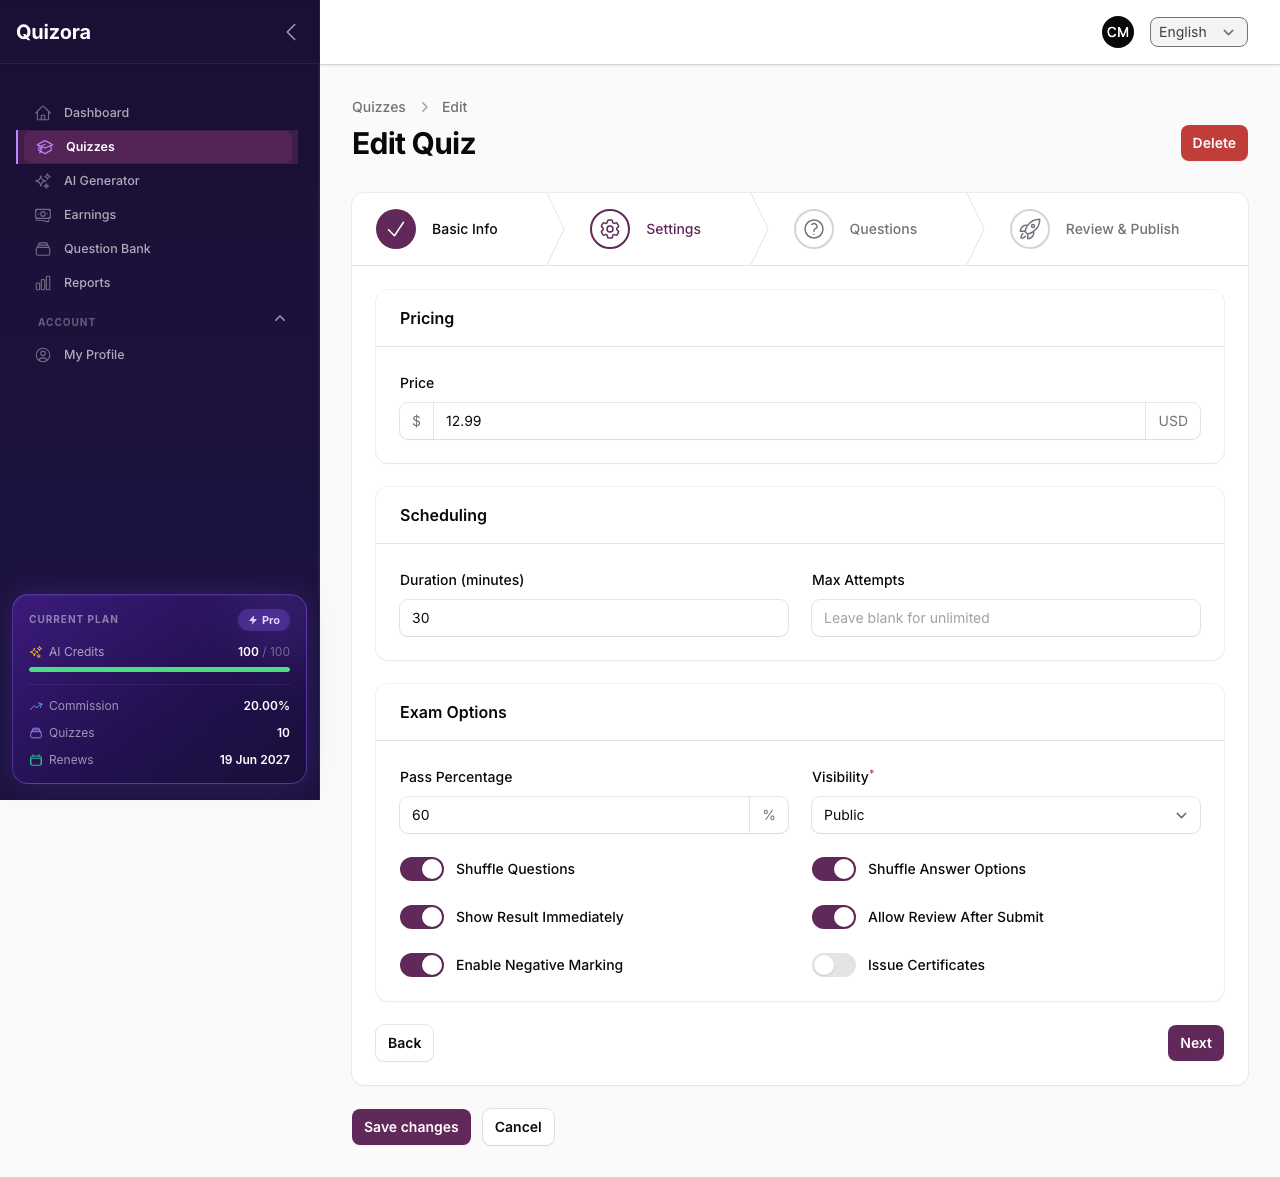
| Setting | Description |
|---|---|
| Price | Set to 0 for a free quiz, or enter a price in your currency |
| Duration | Total time limit in minutes (leave blank for no limit) |
| Max Attempts | How many times a student can attempt the quiz |
| Start / End Date | Schedule the quiz for a future date, or close it automatically |
| Pass Percentage | Minimum score to "pass" (default: 60%) |
| Negative Marking | Deduct marks for wrong answers |
| Shuffle Questions | Randomise question order for each attempt |
| Shuffle Options | Randomise option order for each question |
| Show Result Immediately | Show score right after submission |
| Certificate on Pass | Auto-generate a PDF certificate for passing students |
Step 3: Questions
The Questions step is a full question manager built into the quiz wizard. You can add questions manually, generate them with AI inline, or import from your Question Bank — all without leaving the page.
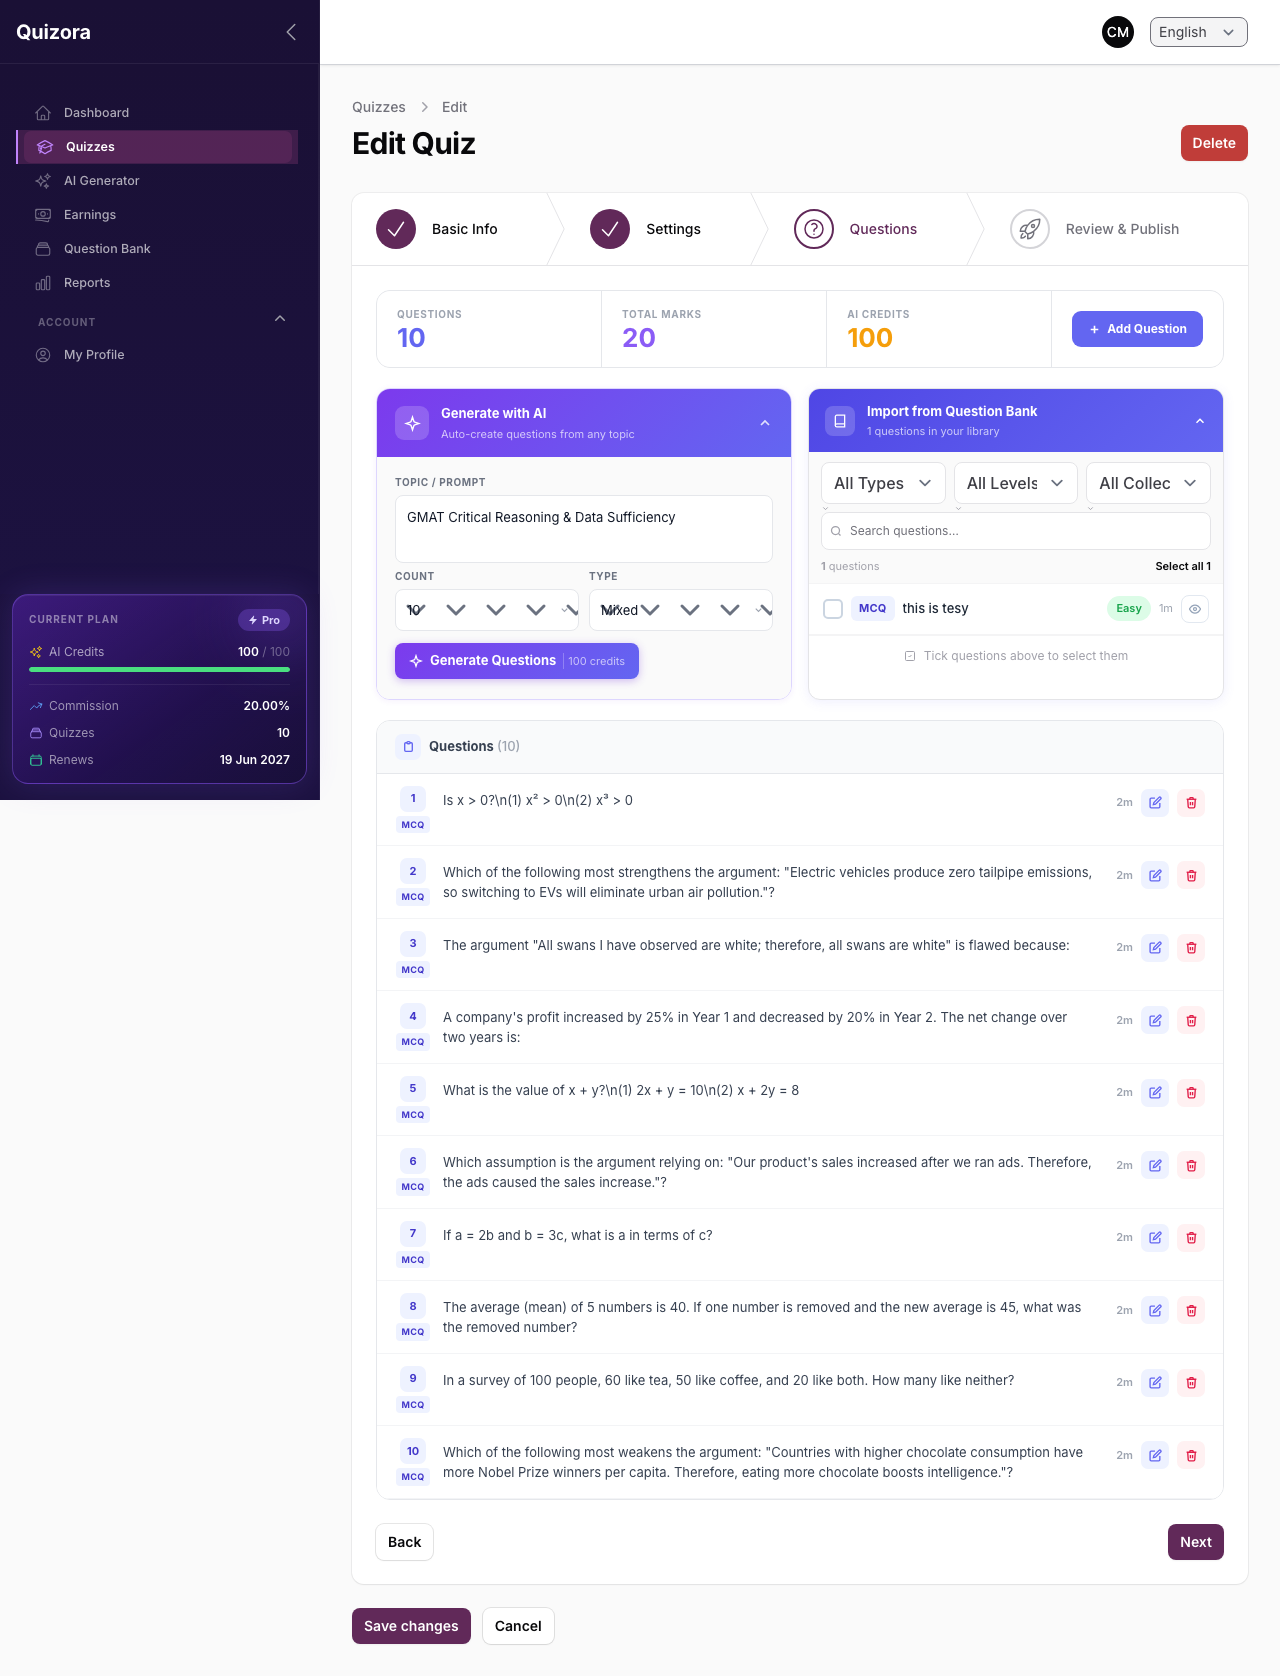
Stats bar
At the top you'll see live counters:
| Stat | Description |
|---|---|
| Questions | Current number of questions in this quiz |
| Total Marks | Sum of marks across all questions |
| AI Credits | Your remaining free AI generations |
Use + Add Question to open the manual editor, or Import from QB to pull saved questions from your library.
Generate with AI (inline)
The left panel lets you generate questions without opening the separate AI Generator page:
- Enter a Topic / Prompt (pre-filled with your quiz title)
- Set Count, Difficulty, Type, and Generate in Language
- Click ✦ Generate Questions
- Watch the right panel show streaming progress as questions are created
- When done, review the generated cards — use the Included toggle to exclude any you don't want
- Click ✓ Add N to Quiz to import the selected questions
Expand / collapse
Use Expand all / Collapse all in the results bar to quickly review question bodies before adding them.
AI Credit Usage
Each generation uses one AI credit. Your remaining credits are shown in the stats bar. When free credits run out, the cost is deducted from your wallet balance.
Import from Question Bank
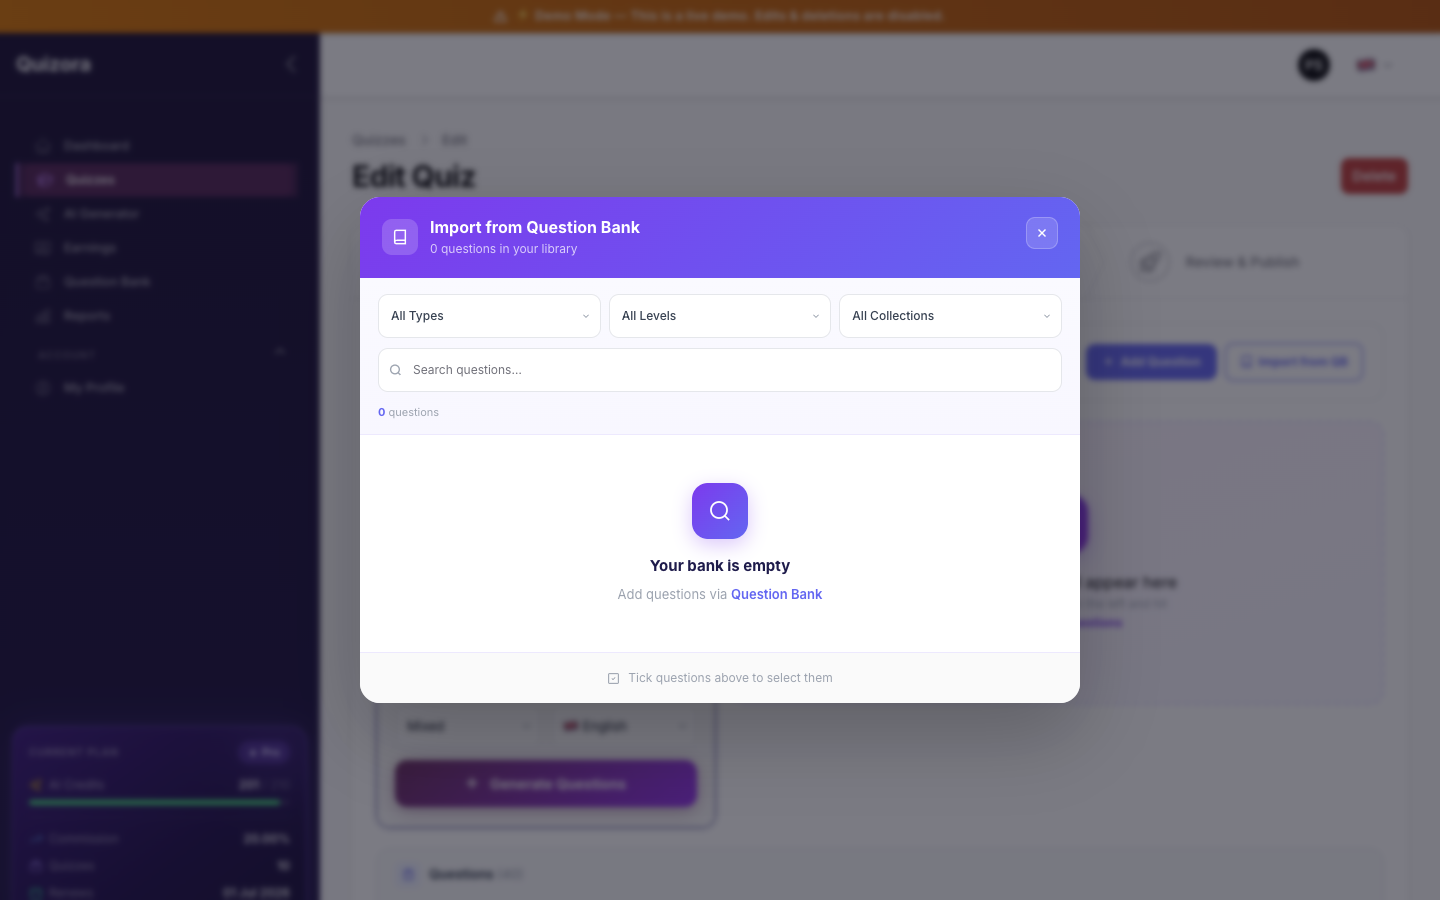
- Click Import from QB
- Filter by type, difficulty, or collection, or search by keyword
- Tick the questions you want
- Click Add to Quiz
Questions already in this quiz are hidden automatically.
Question list
Below the AI panel, all quiz questions are listed with:
- Drag handle — reorder questions
- Type badge — MCQ, T/F, Fill Blank, etc.
- Edit — open the inline question editor
- Delete — remove from the quiz
Manual — Adding a Question
- Click + Add Question
- Enter the question text and choose the type
- Add options (for MCQ) or correct answers (for Fill in the Blank)
- Mark the correct option(s)
- Optionally set marks, negative marks, hint, and explanation
- Click Save
Question Types:
| Type | Description |
|---|---|
| MCQ (Single) | One correct answer from multiple options |
| MCQ (Multiple) | Multiple correct answers — student must select all of them |
| True / False | Two-option question |
| Fill in the Blank | Student types an answer; matched case-insensitively |
| Short Answer | Free-text answer (manual grading) |
Standalone AI Generator
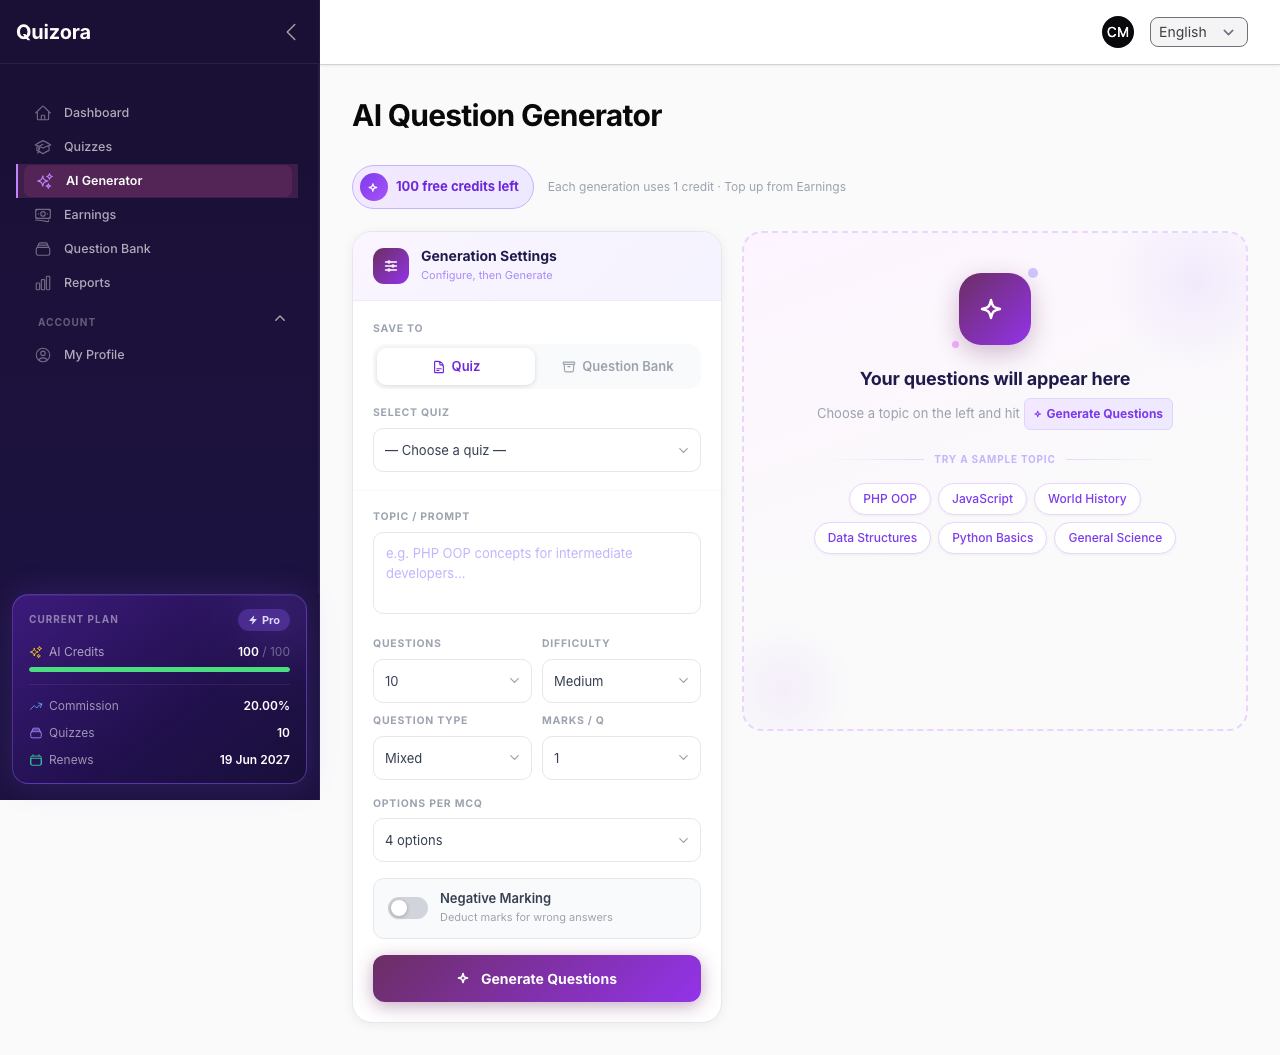
You can also use Creator → AI Generator for a full-screen generation experience. Generated questions can be saved to your Question Bank or added to a quiz from there.
Step 4: Preview & Publish
Review how your quiz looks, then click Publish. Your quiz immediately appears on the public discovery page.
To schedule a quiz for a future date instead, set the Start Date in Step 2 and use Save as Scheduled instead of Publish.
Managing Existing Quizzes
From Creator → Quizzes, you can:
- Edit a quiz at any time (even after publishing) — the Questions step uses the same inline manager shown above
- Archive a quiz to remove it from public discovery without deleting it
- Duplicate a quiz to create a similar one quickly
- View Analytics for any published quiz
Analytics
Creator → Reports
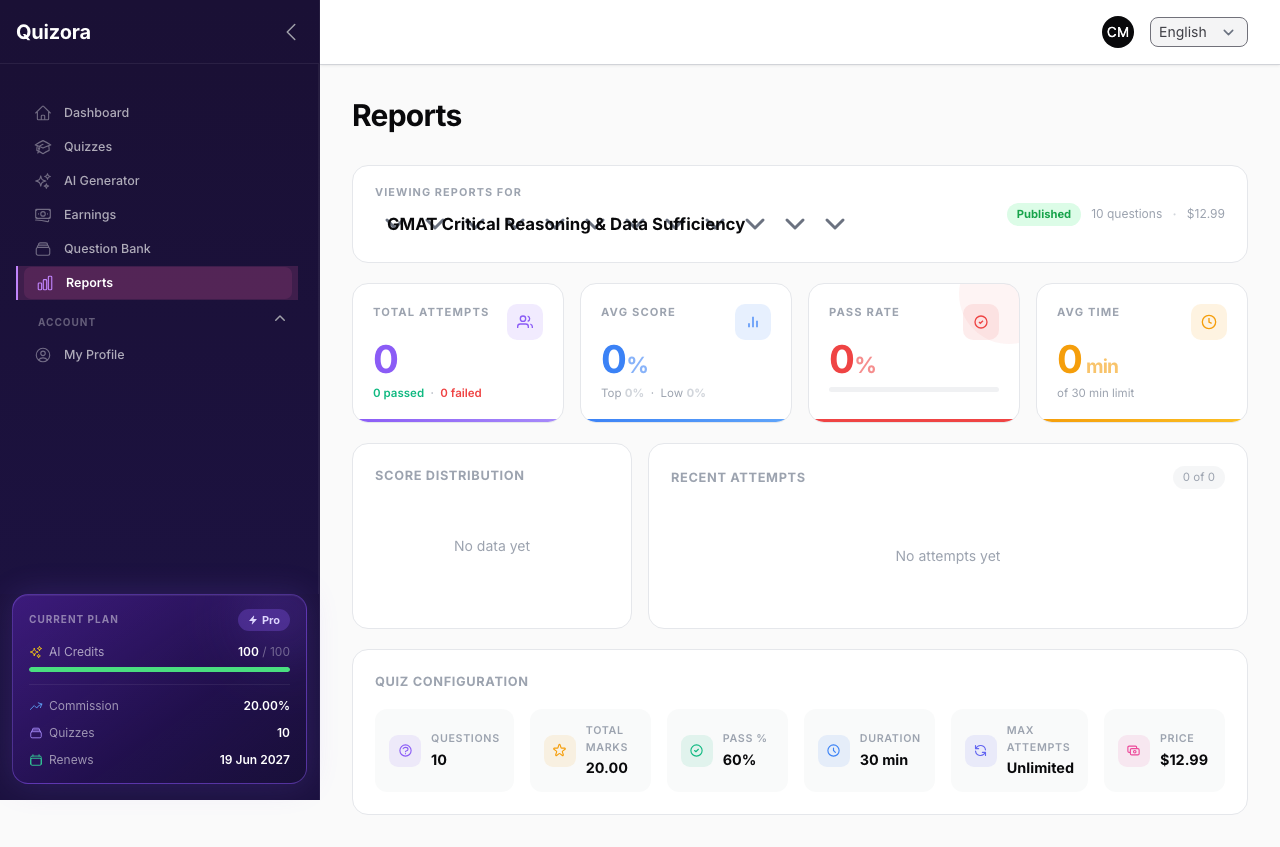
For each quiz, you can see:
| Metric | What It Tells You |
|---|---|
| Total Attempts | How many students have attempted this quiz |
| Average Score | Mean score across all completed attempts |
| Pass Rate | % of students who met the pass threshold |
| Drop-off Rate | % of students who started but didn't finish |
| Question Analysis | Which questions had the highest wrong-answer rate |
Use question analysis to identify questions that are too hard, confusingly worded, or have incorrect answer keys.
Earnings & Payouts
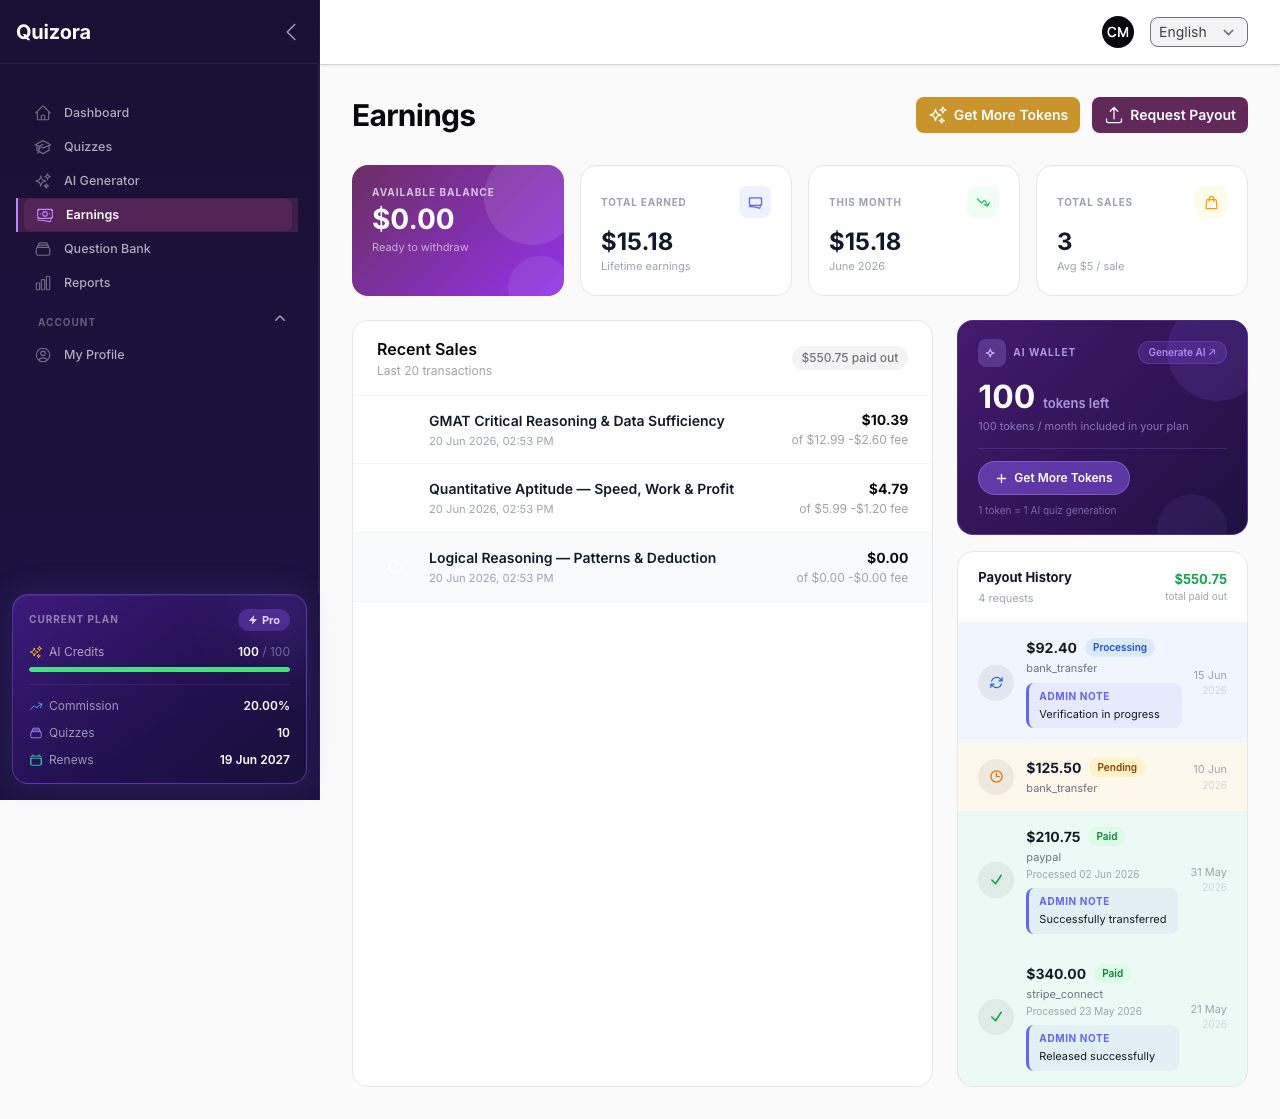
Creator → Earnings
Here you see:
- Your wallet balance (total earnings minus payouts processed)
- Transaction history — every quiz sale, AI charge, and payout
- Payout requests — submit a withdrawal request
How Earnings Work
When a student buys your quiz:
- Their payment goes through the platform
- The platform deducts its commission percentage
- Your share is credited to your wallet
Example: Quiz price ₹500, platform commission 20%
- Your earnings: ₹400
- Platform keeps: ₹100
Requesting a Payout
- Go to Earnings → Request Payout
- Enter the amount you want to withdraw
- Enter your bank/UPI/PayPal details
- Click Submit Request
The admin reviews and processes your payout (typically within 1-3 business days). You'll receive an email confirmation when it's done.
AI Credits & Wallet
Creator → Dashboard (AI Credits widget)
- Free Credits — From your subscription plan; reset each billing period
- Wallet Balance — Used for AI charges and can be topped up via the payment gateway
- Top Up Wallet — Click to add funds; minimum top-up is ₹100
Language
Your creator panel supports English and Hindi. Use the language switcher in the top-right corner.